Tuesday, January 24, 2012

Fire-Roasted Corn Guacamole

Guacamole is by far my favorite condiment. I've made many different versions, but decided to share this fire-roasted corn edition. The sweet smokey punch of the roasted corn works very well with the freshness of the avocado, tomatoes and cilantro. In my very biased opinion, it goes great with anything!

Fire-Roasted Corn Guacamole


Servings: 3 (more or less depending on how liberal you are with it)
Total Time: 5 minutes

Components
1 avocado
1 ear fire-roasted corn, kernels removed
1/2 white onion, chopped
1 small roma tomato, chopped
2 tbls. cilantro, chopped
Juice and zest of 1/2 lime
Salt and pepper to taste

Method
1. Scoop out the avocado into a medium sized bowl and mash.

2, Add the remaining ingredients and stir.

3. Serve immediately or refrigerate.

Comentary
1. To roast the corn, either preheat a grill, or broiler. Remove the husk and rub the corn with canola oil. Season with salt and pepper. Grill or broil, rotating the corn so the kernels brown evenly.

Chipotle-Lime Rice

This side dish accompanied my Inside Out Chicken Taquitos, and features noticeable flavor parallels. My dire desire for food fire inspired the chipotle additions. The rice is not, however, too hot to handle. It features a nice spice that dances around on the back of your tongue for a moment before gracefully exiting and leaving your palate craving more.

Chipotle-Lime Rice


Servings: 3
Total Time: 15 minutes (assuming rice is already cooked)

Components
2 c. cooked brown rice
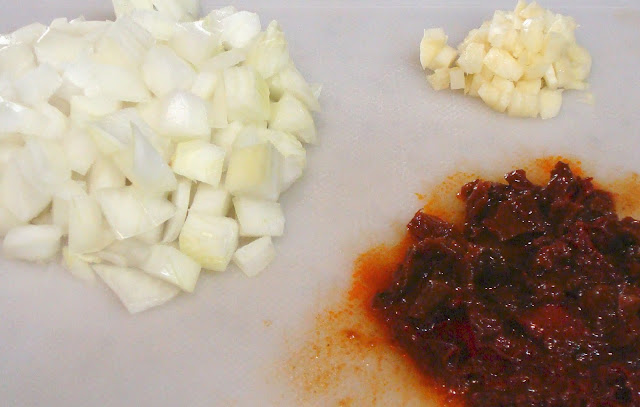
1/2 white onion, chopped
2 cloves garlic, chopped
2 chipotle peppers in adobo sauce, chopped
2 tbls. cilantro, chopped
1/4 c. beer
Juice and zest from 1/2 lime
1 tbl. olive oil
Salt and pepper to taste

Method
1. Heat oil in skillet and sweat onions for about 3 minutes.

2. Add the garlic, season with salt and pepper and continue cooking until onions begin to brown.

3. Toss rice into skillet and saute for a couple minutes. Allow any excess moisture to evaporate. Don't worry if the rice sticks to the pan.

4. Deglaze the pan with the beer and stir the rice to scrape off the bits of flavor stuck to the pan. Immediately add the chipotles and stir again.

5. Allow most of the beer to reduce. If the rice looks too dry, add a little more beer.

6. Once the beer has reduced and the moisture level is to your liking, add the lime juice and cilantro. Stir one last time and serve.

Commentary
1. It is important to give the onions a head start so the garlic doesn't burn.

2. Adjust the  heat level by adding more or less chipotles.

Monday, January 23, 2012

Inside Out Chicken Taquitos

I'll be honest, I can't remember the last time I ordered taquitos anywhere. The little rolled, filled and fried tortillas that tantalize the tongues of millions just don't do it for me. Don't get me wrong, I'm a huge connoisseur of Mexican cuisine, but to me taquitos have always been lost in the shadows of many other much more desirable dishes. You just can't pack enough protein into a tiny corn tortilla to satisfy my masculine desire for meat. My sister, however, drives the taquito bandwagon, so I thought I would put a twist on the dish in her honor. To ensure that my taquitos were served with enough meat, I just decided to use chicken instead of a tortilla. Yes, I said chicken. Beat a chicken breast enough with a frying pan and it will become flat enough to mimic a tortilla's wrapping ability...kind of. Another major difference...the taquitos aren't fried, they're baked. Oh yeah, and you're gonna need a fork!

Inside Out Chicken Taquitos

Inside Out Chicken Taquitos with Chipotle-Lime Rice and Fire-Roasted Corn Guacamole
Servings: 4
Total Time: ~ 1 hour (plus an additional 30 minutes for marination)

Components
4 chicken breast halves
1 c. beer
2 green onions, chopped
2 garlic cloves, chopped
2 tbls. cilantro, chopped
1 can refried pinto beans
1 c. shredded jack and cheddar cheese (plus more for garnish if desired)
Juice of 1 lime
Salt and pepper to taste

Method
1. Pound out each chicken breast half to 1/4 in. thickness and place in a marinade bag.

2. For the marinade, combine beer, green onions, garlic, cilantro, lime juice, salt and pepper. Pour contents into marinade bag over the chicken. Allow to marinate in refrigerator for 30 minutes.

3. Preheat oven to 375 degrees.

4. After the chicken has marinated, heat up the beans. This is not completely necessary, but will make them easier to spread.

5. For each breast, lay the chicken out flat. Spread some beans and cheese onto the breast (leaving about 1/2 in. between filling and edge of chicken) and roll as if rolling a tortilla around filling for a taquito. Place the chicken onto a shallow baking pan lined with foil and cooking spray (to facilitate cleaning and serving duties respectively). 

6. Season the top of the taquitos with salt and pepper bake for 30 minutes.

7. Remove taquitos and garnish with more cheese. Return to oven and bake until cheese is melted and bubbly. 

Commentary
1. If you're pressed for time, the marinade can be skipped. However, I found that it really added a nice depth of flavor and helped keep the chicken moist during the cooking process. 

Tuesday, October 11, 2011

Whoa Nellie: Good Food for a Rumbling Belly

Location: Lee Vining, CA
Date: Aug. 25, 2011

A sign catering to your car and your hunger
No, your eyes do not deceive you. The sign above reads "Mobil" (as in a gas station) and "Restaurant" (as in a culinary destination). Two places that are not typically collaborative have joined forces just outside Yosemite National Park, on the corner of Highway 120 and Highway 395, to satisfy empty tanks for both vehicles and their occupants alike.

I don't know about you, but I generally think of gas stations as nice places for motorized modes of transportation to splurge on as much premium fuel as their drivers are willing to flush into their overzealous tanks. Hungry humans, however, are limited to over processed crap in a sack; food options that are about as good for your body as 50-year-old gunky motor oil is for your vehicle's engine. That is, of course, until my experience at Whoa Nellie Deli gave me hope that great food can be found at some (albeit a very limited 'some') gas stations.


Due to an intriguingly hyped recommendation from a longtime friend, my family and I decided to give this place a try for one of the seven dinners that we annually devour in the Eastern Sierras. Upon entering, I noticed immediately that we didn't quite fit in. By no means were we outcasts, but the majority of the patrons were dusty and visibly exhausted from a long day or two (or three or more) of enjoying the memorable experiences that Yosemite has to offer. My family and I, on the other hand, were pretty clean and fresh off another relaxing day at June Lake, a few miles down Highway 395. Nevertheless, we were hungry. If not for spending hours trekking through one of John Muir's picturesque wooded asylums, then we were simply hungry because we were on vacation, and wanted to eat.


For a deli in a gas station, there were quite a few enticing choices. Wild Buffalo Meatloaf and Legendary Lobster Taquitos were undoubtedly an unexpected duo on the very captivating list of menu items. Our inside source, however, advocated an article much simpler. A margarita from the left. A pizza from the right. That'll do.


World Famous BBQ Chicken Pizza with cilantro pesto. I don't know how the classically Californian pie from an unconventional gas station eatery ascended the culinary ranks to global prominence, but it was damn good. Let's take it from the top. Sesame seeds...eh. I don't know why they were there. Flavor and texture? Unnecessary. Presentation? I guess so, but it's pizza from a gas station in the mountains. In this case, I care very little about appearance. I'm all about the taste. No food presentation would be comparable to the pristine surrounding Sierra scenery anyway. The BBQ sauce was sweet, thick and hearty. Tasting it took me back to cherished family cookouts. The mozzarella cheese was successfully transformed into the molten dairy darling synonymous with all great circular flat breads. There was plenty of cheese to form long strings of mozzarella goodness from its source to my taster, but not enough to overpower the other components. The chicken was amazing. Dark meat was used, which kept each bite of chicken succulent and moist, thanks to a slightly higher fat content. More fat also meant more taste, thus dark chicken brought another level of flavor to an already flavorful bite of pizza that white meat just wouldn't have had. And there was plenty of it. I believe I got a piece of chicken in just about every bite. The most surprising aspect of the pizza was the cilantro pesto. It was unexpected, but added a very fresh flavor in a creamy package that helped balance the rich hearty flavors of the other ingredients. In order to support such a cast of delectable ingredients, a solid base is a must. The crust on this pizza was just that. Solid. It was charred and crisp, but retained a slight chew. Most importantly, it stood up to the task of bringing each memorable bite from the paper plate to my watering mouth.


Why wouldn't this place have dessert? With four mouths to feed, one dessert wouldn't suffice. Carrot cake was one of two gigantic slices of dessert that my family splurged on. This cake was loaded. Carrots obviously took the lead, but it was surrounded by an ensemble of talented costars from raisins to, well, unfortunately, other unidentifiable ingredients. The six layers of cake could have easily satisfied any sweet tooth on their own. Its inherent moisture warranted no need for any creamy frosting to mask potential dryness, but the cream cheese frosting was there in full force. It was so sweet, creamy and rich. The combination of moist cake and creamy frosting successfully spoiled every last one of my nearly 10000 taste buds with sweet, sweet bliss. The textural contrast provided by the nuts on top didn't hurt either.


Chocolate lovers rejoice! This cake could satisfy any chocolate craving known to man/woman. I really don't know how to describe this treat other than it was 100% chocolate. It was bittersweet and sweet. The cake itself was dense, but moist. It stuck together well without becoming too crumbly. The chocolate ganache was so rich. Not quite as creamy as the carrot cake's frosting, but it melted in my mouth and created a favorable flow of chocolate that coated my tongue, and helped transport each dense bite of cake down my throat. The only thing this monstrous slice of chocolate cake needed was a nice tall glass of ice cold milk. 

If you ever find yourself planning a trip to Yosemite, or anywhere near this place, do yourself a favor and stop by. Your hunger will be satisfied, and taste buds eternally grateful. 

Sunday, October 2, 2011

Pineapple & Coconut Marinated Chicken Kabobs

The most difficult part of this dish may just be skewering all of the ingredients. It's a little time consuming, very repetitive and possibly dangerous if you let your focus slip and skewer your finger instead of a piece of chicken. Fortunately, that scenario did not happen to me, but it did cross my mind a couple times, leaving me with thoughts of, "That would really suck if..."

This dish is simple, and tastes great. Soaking the chicken in my homemade marinade keeps it moist and saturates it with sweet and spicy flavors. Grilled pineapple is sweet and always delicious. The flavor of peppers and onions are also greatly enhanced when grilled.

Pineapple & Coconut Marinated Chicken Kabobs

Pineapple & Coconut Marinated Chicken Kabobs
Servings: 3
Total Time: ~1 hour + 20 minutes

Components
For marinade:
8 oz. can crushed pineapple in juice
3/4 c. coconut milk
1/4 c. honey
2 tbls. crushed red pepper
1 tbl. ginger, chopped
Juice and zest of 1 lime
Salt and pepper to taste

For kabobs:
3 chicken breasts, cut into uniform chunks
1 fresh pineapple, chopped into chunks
1 green bell pepper, chopped into chunks
1 red bell pepper, chopped into chunks
1/2 red onion, chopped into chunks
Salt and pepper to taste
6 wooden skewers, soaked in water

Method
1. Combine all ingredients for marinade in a mixing bowl. Place chicken and marinade into a large freezer bag. Refrigerate and marinate for 1 hour.

2. After the chicken has soaked, preheat grill to medium heat.

3. Build your kabobs. Obviously, order doesn't matter, but I went onion, chicken, bell pepper, pineapple, onion, chicken, other color bell pepper, pineapple, etc. until I had gone through the process 5 times.

4. Brush the kabobs with canola oil, or mist with cooking spray. Season with salt and pepper.

5. Space evenly on the grill. Cook 5 to 7 minutes on each side, or until chicken has cooked through.

Commentary
1. Plain pineapple juice will work just fine in the marinade. I only used a can of crushed pineapple because it was readily available and convenient.

2. Discard all marinade after the marination process has finished.

3. Keep all ingredients as uniform in size as possible in order to ensure even cooking.

4. For a very tasty and filling meal, serve kabobs with Shrimp-Coconut Rice and a side salad. Mixing all components of the kabobs with the rice also adds crunchy textural contrasts. Garnishing with lime wedges isn't a bad idea either.

Coconut-themed surf and turf meal

Shrimp-Coconut Rice

I've never cooked with coconut milk...until now. This side dish is a great balance of creamy, sweet and spicy flavors. I used it as a very flavorful pairing to my Pineapple & Coconut Marinated Chicken Kabobs.

Shrimp-Coconut Rice


Shrimp-Coconut Rice
Servings: 3
Total Time: ~20 minutes

Components
2 c. cooked brown rice
3/4 lb. 71/90 count shrimp
1 jalapeno, diced
1 Fresno chile, diced
1 tbl. olive oil
3/4 c. coconut milk
2 tbls. toasted sesame seeds
1 tbl. ginger, grated
1 tbl. honey
Juice and zest of 1 lime
Salt and pepper to taste
2 tbls. fresh cilantro, chopped

Method
1. Heat olive oil in a large skillet. Once hot, toss in jalapeno and Fresno chiles. Allow peppers to sweat for 3 to 4 minutes.

2. After peppers have sweat, add shrimp. Season with salt and pepper. Allow shrimp and chiles to cook until shrimp becomes pink.

Shrimp and chiles near completion
3. Add rice and coconut milk. Bring milk to a boil.

4. Once boiling, add all other ingredients except sesame seeds and cilantro. Reduced to a simmer and cover. Allow simmer to continue for 10 minutes.

5. Just before service, mix in cilantro and sesame seeds.

Commentary
1. For more flavorful rice, cook in chicken stock.

2. Add more peppers for more spice, or increase honey dosage for a sweeter dish.

3. Be sure to check the seasonings after the rice has simmered. Adjust to your liking if needed.

Thursday, September 15, 2011

Chipotle Black Bean Grilled Tostada Pizza

Pizza Tuesday is a weekly family tradition I do not plan on giving up anytime soon. Because Taco Tuesday is also a popular theme for the pre-hump day meal, I thought it'd be a great idea to create a Southwestern flavored pie. Inspired by California Pizza Kitchen's version, this flat bread tastes and looks like a giant tostada. I added my own personal twists by including chipotles and using a grill. Grilling the crust gives this pizza a nice charred flavor that is reminiscent of the smoky flavor inherited by a wood-fired oven. Also, the pizza's thin crust provides a nice crispy base that reminds the taste buds of a crunchy tostada shell.

Chipotle Black Bean Grilled Tostada Pizza


Servings: 3
Total Time: ~20 minutes

Components
1 can black beans
1 clove garlic, chopped
1/2 onion, chopped
1-2 chipotle peppers in adobo sauce
1 c. chicken stock
1 tbl. olive oil
6 chicken tenderloins (or 2 chicken breasts), cooked and cubed or shredded
1 c. shredded Cheddar and Monterey cheese
1/2 avocado, diced
1 roma tomoato, diced
3 tbls. cilantro, loosely chopped
1-2 tbls. ranch dressing
Juice of 1/2 lime
1 pizza pie crust (I made my own, but store bought will work)
Salt and pepper to taste

Method

 
1. Preheat oil in large skillet. Once warm, saute onions until translucent. Add garlic, season with salt and pepper and continue to cook until onions brown. Finally, toss in chipotles.

2. Rinse black beans and toss into pan. Add chicken stock and allow beans to simmer until about 3/4 liquid reduces. This will take 5-10 minutes. Check the seasoning. Add more salt and pepper if needed.


3. Once most of the stock is reduced, blend beans in a blender. Make them as chunky or as smooth as you'd like.


4. Preheat your grill to medium heat. Coat the pizza crust in olive oil or cooking spray.

5. Once the grill is heated, toss the crust onto the grill.


6. The crust will begin to crisp quickly. Give it a couple minutes and flip. Wait another couple minutes for the second side to brown. Remove and place onto a baking sheet.

7. Top the pizza crust with beans, cheese and chicken. Place back onto the grill. Remember to keep the crust on the baking pan so the bottom doesn't burn.


8. In a couple minutes, the cheese should be melted, and all other toppings should be warmed through. Remove from grill and top with cilantro, tomatoes and avocados. Drizzle with ranch and lime juice. Finalize with a light touch of fresh cracked black pepper.


Commentary
1. You don't have to make your own beans. A can of refried beans will work. I would still suggest spicing up the canned refried beans with chipotles, however.

2. Grilling the crust can be a little tricky, but the oven works just fine too.